

How Do I Repair A Cord Which Has Been Chewed
Learn how to fix an extension string or other electrical string for $5. End throwing out small appliances because the dog chewed the electrical cord! These simple steps take only a few minutes to save money and time. Includes 2 prong and 3 prong plugs and video instructions.
Today's mail service is sort of random, just you wouldn't believe how many times this has come up up for usa. From extension cords to power tools, nosotros accept had to supersede several plugs.
A neighbour accidentally burned our sander cord, the dog chewed the lamp cord, a friend'due south crock pot melted, fixing an extension cord that was a little too extended, and the list goes on.
This is a smashing way to save some money as extension cords and power tools are very expensive. And information technology only takes a few minutes! While I don't advocate trying to practice a habitation improvement project you aren't prepared for, if you can put in a calorie-free fixture, this is even more than uncomplicated.
While you lot tin can replace the cord itself, and splice together, I find this method easier and more steady long term. This method will supersede both bad plugs and damaged cords.
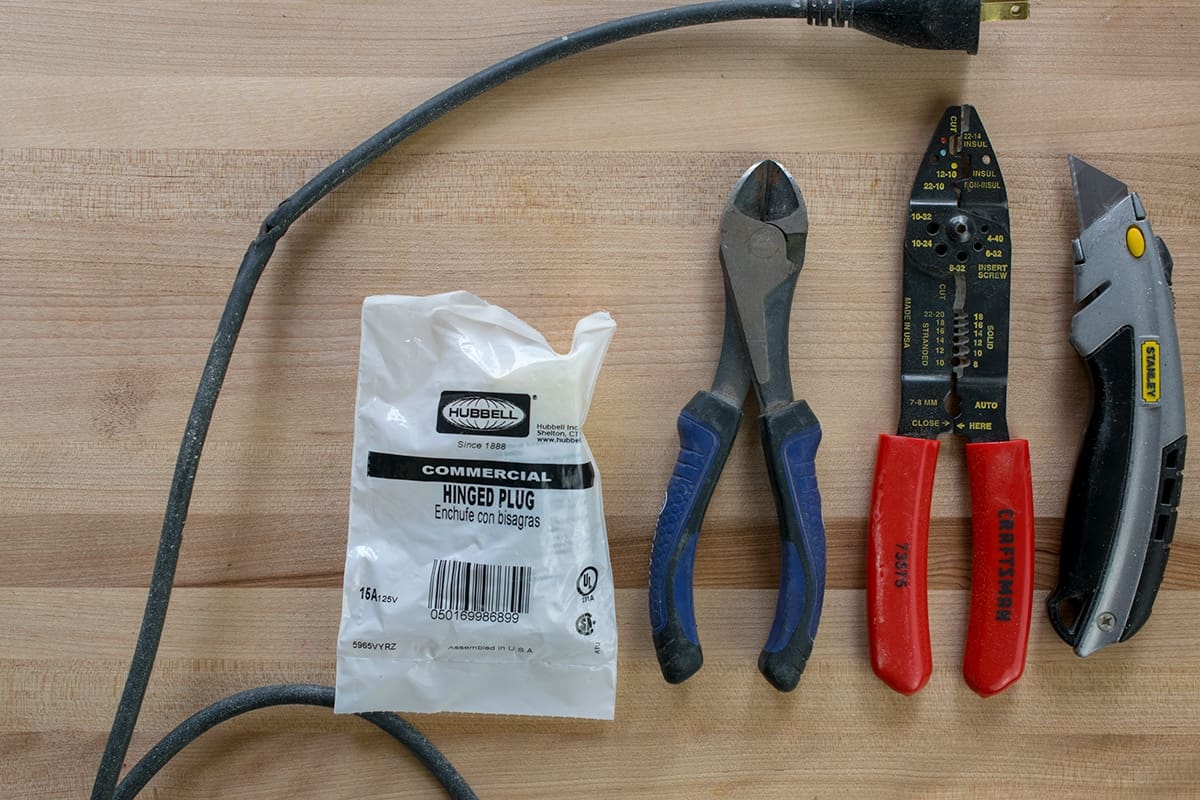
Recommended Supplies
- Wire cutters or scissors
- Razor Bract
- Strippers– this set also has a pocket-size cord cutter built in.
- Replacement Plug – For exterior plugs similar power tools, extension cords, etc, I recommend a commercial grade plug like this. Sometimes wires can pull over time out of cheap plugs. Supervene upon a 2 prong plug with a 2 prong and a 3 prong (grounded) plug with a 3 prong.
Tip: The numbers on the side of stripper tools refer to the wire gauge or AWG. Equally the wire gets smaller in bore, the AWG number increases. It is of import to annotation that wire strippers usually take two sets of numbers, one for stranded wire and the other is for solid wire.
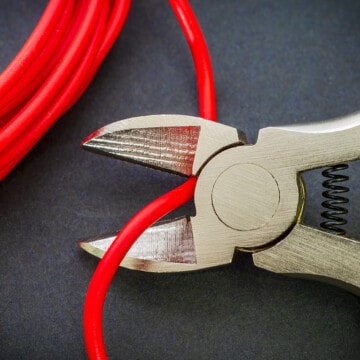
What tool is all-time to cut wires?
For small wires or those with a thin casing, a good set up of strippers is the easiest bet. If yous are unfamiliar with using strippers, here is a quick guide.
For cutting or stripping big wires or those with thick plastic coatings, I like super sharp cut pliers. The classic wire strippers just never seem to pull the plastic covering off well even if yous have the correct size. Cut pliers don't need to be large or heavy for most wires, they need to be sharp, and you will accept to rotate them around to remove the wire covering.
Some strippers come with a cutting department and a apartment plier section. I don't similar many of those because they tend to shell more than actually cut, but I take nothing against them if y'all find a good pair that works for you.
How To Supersede a Three Prong Plug
The instructions for a iii prong plug are also at the bottom of this mail with step-by-step photos, but at that place are a few tips for identifying wires and terminals included here.
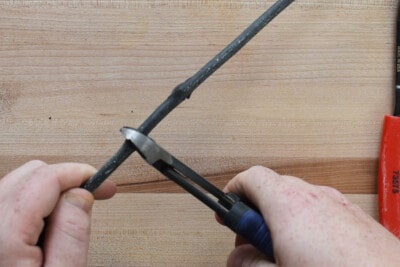
- Using scissors or wire snips, cutting the wire only behind the damaged area. Make sure the particular is unplugged (yep, I had to say it!).
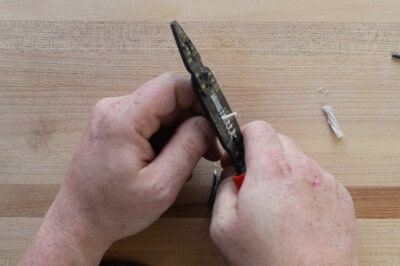
- Carefully remove one inch of the outer covering without cut into the wires themselves. The easiest way is to cut down with a razor blade about an inch and then unwrap and cut off the outer casing. Yous will want to take roughly an inch exposed at to the lowest degree.
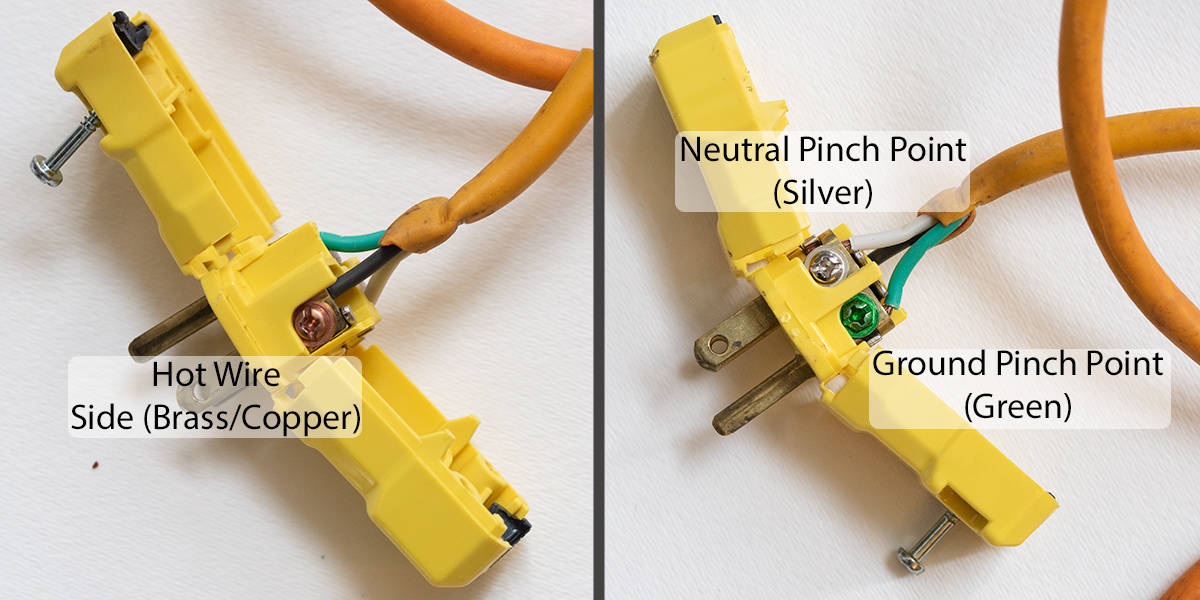
- Place the wires. In 3 pronged plugs, the white wire is always the neutral wire. The basis wire is either light-green or a copper wire with no casing. The hot wire is the terminal i and is black.
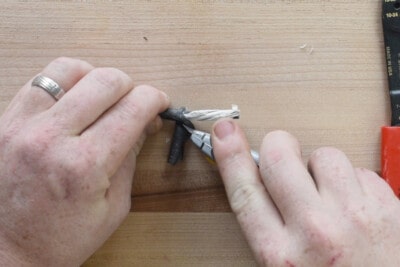
- Using strippers (or a razor blade), cut ½ inch of the colored casing around the wire off, exposing the bare metal. Not to fret if y'all cut through the wire or cut into the wire, just cut dorsum the outer example dorsum a bit further and endeavor again.
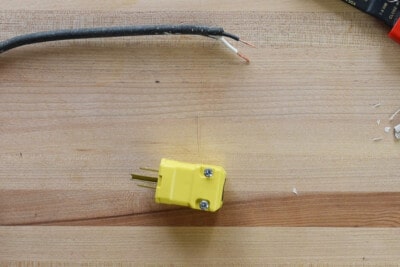
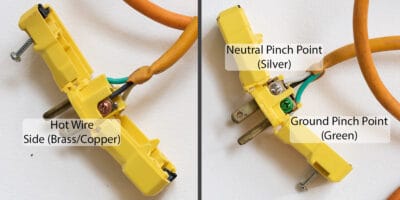
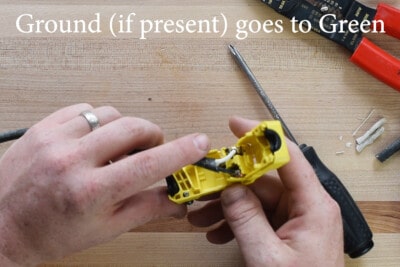
- Open up the replacement plug according to the instructions. Push the white (neutral) wire into the argent compression indicate. Tighten the screws and lock the wire in place. The black wire (hot) goes into bronze or copper colored pinch indicate. The green or copper wire (basis) goes into green compression betoken. All wires should be securely screwed as well.
- Close upward the replacement plug , ensuring that none of your wires or casings are exposed outside the plug housing. You lot should give information technology a tug to make sure none of the wires movement or carve up from the plug housing.
Tip: Afterward identifying the wires, you can employ some tape effectually the wires to label them and go on from mixing the wires upwards. (This occasionally helps me speed things upwards.)
How To Replace A Two Prong Plug
This process is nearly the aforementioned as that of the three prong plug. However, there is not a grounded or green wire in a ii prong string.
- Using scissors or wire snips, cut the wire but behind the damaged area. Make sure the detail is unplugged (yes, I had to say it again!).
- Strip the wires. Most two prong appliance cords don't have a protective outer casing, merely if yours does, remove i inch back from the end. Yous may take to peel the two sides autonomously. Cut ½ inch of the protective plastic around the wire off, exposing the bare metal.
- Open the replacement plug co-ordinate to the instructions. There should be a silver last on one side and a bronze/copper colored concluding on the other, each with a screw. Push the white (neutral) wire into the silver pinch point. Screw and lock the wire in place. The black wire (hot) goes into aureate pinch point and securely screwed.
- Shut up the replacement plug, ensuring that none of your wires or casings are exposed outside the plug housing. Yous should requite information technology a tug to make sure none of the wires move or separate from the plug housing.

Identifying wires: The neutral wire (white wire) volition always exist marked in some style: writing on the length of the wire, ribbing, a white stripe, or a thin white covering effectually the wire itself. If y'all cannot figure information technology out past looking at the cord, the neutral wire is more hands identified by the prongs. Modern appliance cords unremarkably have two prongs of unlike sizes, so that yous can only insert the plug into an outlet 1 style. With cords of this type, the larger prong always connects to the neutral wire.
Video Sit-in
Here is a video of my husband demonstration the technique. I had to operate the camera.
FAQs
Is extension cord repair condom?
I always propose people to never take on projects they have no business organization trying. Exposed wires and melted cords are Not safe; replacing a plug is completely safe as long as you follow the instructions well and identify wires correctly.
What if my cord is too brusk?
If it is too brusk to reach an outlet, you tin can utilise an extension cord. If the cord is too short to wire into a new plug, you would need an entirely new string in order to wire it back into the housing of the item, which tin exist more than difficult and varied from one item to the next.
Can I use this technique on any power string?
This solution works on everything from lamps to power tools. And multiple scenarios including burned plugs, cleaved plug prongs, separated wires and plugs, and even animal chewed electrical cords. I do not recommend utilizing on large appliances such as dryers or electric stoves.
Can you ready a cord that has been chewed in half?
Yep. Follow the same steps every bit for a damaged cord and cut it behind the damaged area.

Sign upwards below to receive updates including free printables, system tips, home comeback projects, recipes and more!
More than Home Improvement Tutorials
-

Weekend DIY Projects -

Update Your Cabinets -

Painting A Garage Floor -

Tools Every Homeowner Should Accept
-
Razor Blade Box Cutter
- i Replacement plug 2 prong or iii prong matching what you are replacing.
-
Using pair of scissors or wire snips, cut the wire simply behind the damaged area. Make sure the item is unplugged.
-
Accept the razor blade and advisedly remove one inch of the outer covering (if one is nowadays) without cutting into the wires themselves. You will desire to have roughly an inch of the wires exposed at least.
-
Identify the wires. In three pronged plugs, the white wire is always the neutral wire. The footing wire is either light-green or a copper wire with no casing. The hot wire is the last one and is black. 2 prong plugs practise non have a green wire.
-
Using wire strippers (or a razor blade), cut ½ inch of the colored casing around the wire off, exposing the bare metal.
-
Open the replacement plug co-ordinate to the instructions. Button the white (neutral) wire into the silver pinch point. Tighten the screws and lock the wire in identify. The black wire (hot) goes into bronze or copper colored pinch point. The greenish or copper wire (footing) goes into green pinch point. All wires should be deeply screwed.
-
Close up the replacement plug, ensuring that none of your wires or casings are exposed outside the plug housing. You should give it a tug to brand sure none of the wires move or split up from the plug housing.
Identifying wires: The neutral wire (white wire) will always be marked in some way: writing on the length of the wire, ribbing, a white stripe, or a thin white roofing around the wire itself. If you cannot figure it out by looking at the string, the neutral wire is more than easily identified by the prongs. Modern appliance cords usually have 2 prongs of unlike sizes, so that you lot tin only insert the plug into an outlet one way. With cords of this type, the larger prong ever connects to the neutral wire.

Source: https://www.cravingsomecreativity.com/electrical-cord-repair-for-small-appliances/
Posted by: cabreralooduale89.blogspot.com
0 Response to "How Do I Repair A Cord Which Has Been Chewed"
Post a Comment